Centro di Taratura accreditato n. 00140

IONIZING RADIATION SECONDARY STANDARD CALIBRATION LAB
EQUIPMENT – CALIBRATION CAPABILITY – LAB ACTIVITY – CALIBRATION REQUEST
The Laboratory is part of the Quality Service of the Politecnico di Milano (Calibration Center No. 00140) as Ionizing Radiation Sector. The Center obtained the extension of the SIT accreditation (now ACCREDIA) to the Ionizing Radiation Sector in February 1999


Equipment
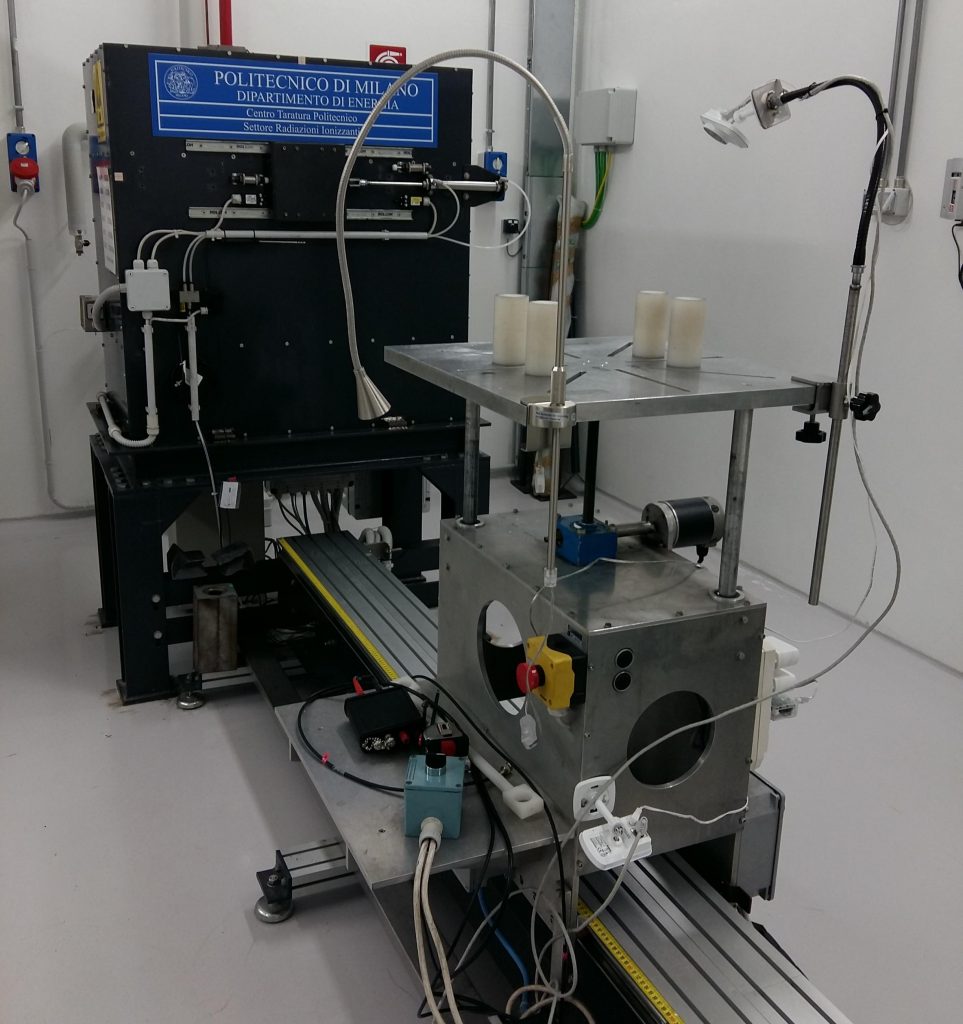
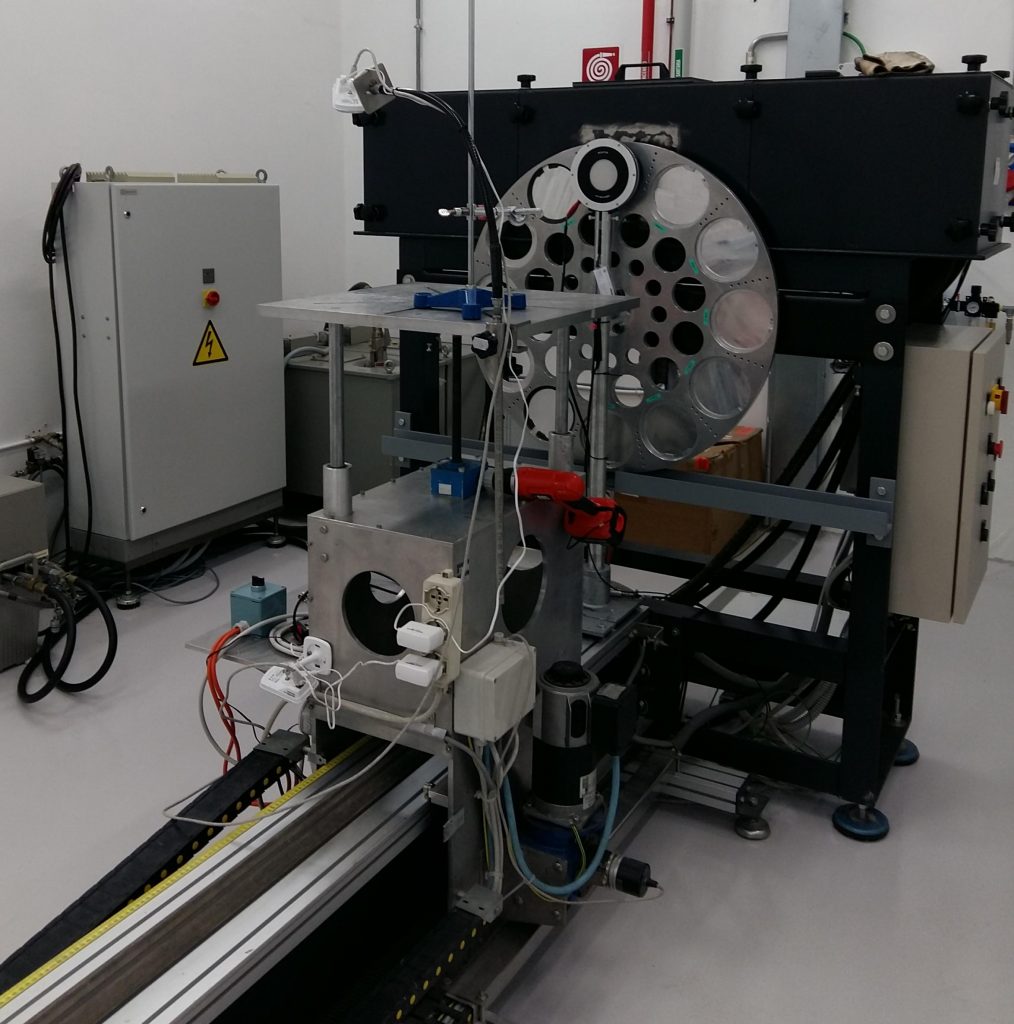
The instruments calibration is done using the reference radiation qualities specified in the ISO 4037-1 and CEI/IEC 61267:2005 standards, produced via an ISOVOLT 320/10 Seifert X-ray generator and a self-shielded irradiator containing 137Cs, 241Am and 60Co sources. The X-ray generator is characterized by a high stability emission, particularly suitable for dosimetry uses.
The laboratory guarantees the metrological traceability by using graphite cavity ionization chambers as reference instruments. The ion chamber reading is done through a charge measuring system.
The irradiation control is guaranteed by a transmission ionization chamber with aluminized mylar walls, associated with a charge measurement system identical to that used for the reference instruments.
In both irradiation facilities (x and gamma) the positioning of the instruments under calibration is done by a laser-aligned optical bench. The source-detector distance is measured with an accuracy of ± 1mm.
Metrological capability
The Laboratory performs calibrations issuing of an ACCREDIA certificate for the following dosimetric quantities:
- Kerma in the air – rate of kerma in the air
- Equivalent personal dose – rate of equivalent personal dose
- Equivalent of environmental dose – rate of equivalent environmental dose
Table 1 shows the radiation qualities certified by ACCREDIA, Table 2 shows the radiation qualities certified by Politecnico
Table of radiation qualities
The following page shows the X-ray and gamma radiation qualities that can be used for calibrations. Table1 lists the qualities accredited by ACCREDIA, therefore the certificate is issued with the ACCREDIA logo. Table 2 lists the radiation qualities accredited by the Politecnico di Milano.
Column 1 Radiation quality code:
- W Series: radiation quality with broad energy spectrum (ISO 4037-1 Standard).
- H Series: high intensity radiation quality recommended for the study of the overload characteristics of some instruments (ISO 4037-1 Standard).
- Series N: quality of radiation with narrow energy spectrum, recommended for the study of the dependence of the response of the dosimeter on the energy of the incident radiation (ISO 4037-1 Standard).
- RQR Series: X-ray quality emerging from the x-ray system, in general radiography, fluoroscopy and dental applications (CEI / IEC 61267: 2005).
- MO-MOA Series: X-ray quality emerging from the x-ray system, in mammography (CEI EN 61223-3-2: 2008 standard)
Column 2 Tension of the X-ray tube
Column 3 Average energy of filtered and gamma X-ray qualities
Column 4 The filtration indicated is additional to the inherent filtration of the X-ray tube (equivalent to 0.35 mm Al).
Column 5 First emivalent thickness of filtered X-ray quality
Column 6 Minimum and maximum values obtainable in environmental dose equivalent and in kerma in air.
Moreover, the Lab performs irradiations/calibrations with the following constraints:
- Maximum times for irradiation of dosimeters: 30 minutes for the quality of X radiation and 12 hours for the quality of gamma radiation.
- Maximum times for calibration of instruments in integration: 4 minutes.
|
Radiation qualities with ACCREDIA certificate |
||||||||||
|
1 |
2 |
3 |
4 |
5 |
6 |
|||||
|
Cod. |
A.T. (KV) |
Mean energy (keV) |
Additional filtration (mm) |
1° HVL (mm) |
Dose equivalent (mSv/h) |
Air Kerma (mGy/h) |
||||
|
Personal Hp(10) |
Ambient H*(10) |
Min |
Max |
|||||||
|
min |
max |
min |
max |
|||||||
|
W-60 (L1) |
60 |
44,5 |
3,5mm Al+0,25mm Cu |
0,18 Cu |
4,30 |
63,47 |
6,66 |
881,04 |
278 |
591,30 |
|
W-80 (L2) |
80 |
56,3 |
3,5mm Al+0,45mm Cu |
0,35 Cu |
5,70 |
109,77 |
8,58 |
1486,53 |
3,22 |
895,50 |
|
W-110 (L3) |
110 |
78,5 |
3,5mm Al+2,0mm Cu |
0,97 Cu |
2,78 |
77,51 |
4,55 |
1018,31 |
1,66 |
598,50 |
|
W-150 (L4) |
150 |
104,0 |
3,5mm Al+1,0mm Sn |
1,89 Cu |
4,48 |
136,29 |
6,58 |
1799,88 |
2,53 |
1111,86 |
|
W-200 (L5) |
200 |
136,4 |
3,5mm Al+2,0mm Sn |
3,15 Cu |
5,68 |
180,53 |
8,39 |
2401,33 |
3,44 |
1579,82 |
|
W-250 (L6) |
250 |
171,7 |
3,5mm Al+4,0mm Sn |
4,35 Cu |
5,25 |
166,70 |
7,87 |
2287,08 |
3,41 |
1563,62 |
|
W-300 (L7) |
300 |
199,0 |
3,5mm Al+6,5mm Sn |
5,21 Cu |
6,05 |
158,92 |
9,18 |
2169,98 |
4,12 |
1561,14 |
|
H-60 (A4) |
60 |
36,4 |
2,9mm Al |
2,41 Al |
22,05 |
324,35 |
34,20 |
4526,06 |
19,53 |
3935,70 |
|
RQR5 |
70 |
34,8 |
2,6mm Al |
2,55 Al |
– |
– |
– |
– |
29,33 |
7058 |
|
RQR7 |
90 |
41,0 |
3,4mm Al |
3,45 Al |
– |
– |
– |
– |
35,30 |
10620 |
|
RQR9 |
120 |
50,8 |
3,7mm Al |
4,98 Al |
– |
– |
– |
– |
42,26 |
16950 |
|
Cs-137 |
– |
660 |
Gamma Radiation |
– |
0,0011 |
6,87 |
0,0011 |
22,006 |
0,00093 |
18,34 |
|
Am-241 |
– |
59,7 |
Gamma Radiation |
– |
0,004 |
0,03 |
0,0041 |
0,0984 |
0,0024 |
0,055 |
|
Co-60 |
– |
1250 |
Gamma Radiation |
– |
0,0040 |
0,029 |
0,0040 |
0,093 |
0,0034 |
0,0805 |
|
Radiation qualities with certificate issued by the Politecnico di Milano |
||||||||||
|
1 |
2 |
3 |
4 |
5 |
6 |
|||||
|
Cod. |
A.T. (KV) |
Mean energy (keV) |
Additional filtration (mm) |
1° HVL (mm) |
Dose equivalent (mSv/h) |
Air Kerma (mGy/h) |
||||
|
Personal Hp(10) |
Ambient H*(10) |
Min |
Max |
|||||||
|
min |
max |
min |
max |
|||||||
|
H-100 (A5) |
100 |
57 |
3,5mm Al+0,15mm Cu |
0,30 Cu |
20,53 |
513,07 |
30,77 |
6924 |
12,22 |
4410 |
|
H-200 (A6) |
200 |
102 |
3,5mm Al+1,2mm Cu |
1,75 Cu |
21,77 |
692,27 |
32,14 |
9197 |
12,44 |
5712 |
|
H-250 (A7) |
250 |
122 |
3,5mm Al+1,6mm Cu |
2,53 Cu |
27,47 |
872 |
20,65 |
11618 |
16,45 |
7425 |
|
H-300 (A8) |
300 |
147 |
3,5mm Al+2,5mm Cu |
3,53 Cu |
127,72 |
3352 |
190,74 |
45920 |
80,33 |
30447 |
|
N-60 (S7) |
60 |
48 |
3,5mm Al+0,6mm Cu |
0,24 Cu |
1,32 |
19,34 |
2,03 |
269,03 |
0,80 |
169,20 |
|
N-80 (S8) |
80 |
65 |
3,5mm Al+2,1mm Cu |
0,60 Cu |
0,51 |
9,85 |
0,76 |
130,79 |
0,27 |
75,60 |
|
N-100 (S9) |
100 |
83 |
3,5mm Al+5mm Cu |
1,12 Cu |
0,21 |
5,11 |
0,29 |
67,10 |
0,11 |
39,24 |
|
N-120 (S10) |
120 |
99,0 |
3,5mm Al+5mm Cu+1 mm Sn |
1,74 Cu |
0,21 |
5,37 |
0,28 |
70,26 |
0,11 |
42,84 |
|
N-150 (S11) |
150 |
116,6 |
3,5mm Al+2,5 mm Sn |
2,41 Cu |
1,11 |
33,6 |
1,63 |
447,93 |
0,64 |
282,18 |
|
N-200 (S12) |
200 |
161,2 |
3,5mm Al+2,0mm Cu + 3,0 mmSn+1,0mm Pb |
4,12 Cu |
0,28 |
8,82 |
0,41 |
117,85 |
0,18 |
80,71 |
|
N-250 (S13) |
250 |
202,5 |
3,5mm Al+2,0 mm Sn + 3,0 mm Pb |
5,31 Cu |
0,21 |
6,69 |
0,32 |
92,95 |
0,14 |
65,32 |
|
N-300 (S14) |
300 |
249,6 |
3,5mm Al+3,0mm Sn + 5,0 mm Pb |
6,22 Cu |
0,20 |
5,40 |
0,31 |
75,40 |
0,14 |
54,81 |
|
MO1 |
25 |
15,9 |
0,06 mm Mo |
0,36 Al |
– |
– |
– |
– |
97,86 |
1252 |
|
MO2 |
28 |
16,2 |
0,06 mm Mo |
0,38 Al |
– |
– |
– |
– |
120,5 |
1884 |
|
MO3 |
35 |
17,1 |
0,06 mm Mo |
0,43 Al |
– |
– |
– |
– |
142,3 |
2760 |
|
MO4 |
40 |
18,1 |
0,06 mm Mo |
0,46 Al |
– |
– |
– |
– |
149,3 |
3360 |
|
MOA1 |
25 |
18,3 |
0,06mm Mo+1,8mm Al |
0,56 Al |
—- |
—- |
—- |
—- |
5,68 |
71,02 |
|
MOA2 |
28 |
19,1 |
0,06mm Mo+1,8mm Al |
0,62 Al |
—- |
—- |
—- |
—- |
8,61 |
130,9 |
|
MOA3 |
35 |
22,9 |
0,06mm Mo+1,8mm Al |
0,92 Al |
—- |
—- |
—- |
—- |
14,49 |
271,7 |
|
MOA4 |
40 |
26,1 |
0,06mm Mo+1,8mm Al |
1,27 Al |
—- |
—- |
—- |
—- |
19,00 |
427,6 |
|
RQR2 |
40 |
26,2 |
2,3 mm Al |
1,41 Al |
—- |
—- |
—- |
—- |
13,64 |
1968 |
|
RQR3 |
50 |
29,0 |
2,35 mm Al |
1.76 Al |
—- |
—- |
—- |
—- |
18,82 |
3396 |
|
RQR4 |
60 |
32,0 |
2,7 mm Al |
2,17 Al |
—- |
—- |
—- |
—- |
20,60 |
4374 |
|
RQR6 |
80 |
37,8 |
3,25 mm Al |
3,01 Al |
—- |
—- |
—- |
—- |
26,04 |
7230 |
|
RQR8 |
100 |
44,2 |
3,7 mm Al |
4,00 Al |
—- |
—- |
—- |
—- |
27,04 |
9762 |
|
RQR10 |
150 |
61,2 |
4,4 mm Al |
6,68 Al |
—- |
—- |
—- |
—- |
32,38 |
13358 |
Below is the link to the ACCREDIA website reporting the accreditation tables with indications of the accredited quantities and the minimum uncertainties available.
Laboratory activities
Activities for external customers:
- Calibration/irradiation certificates with or without ACCREDIA logo, depending on the specific radiation quality.
- Characterization of instrumentation used for radioprotection measures
Teaching:
- Educational activities provided to students of the MoS in Nuclear Engineering
- Teaching activities for radiation protection practictioners
Research:
- Study and characterization of new radiation detectors
- Analysis of the detector response in non-standard conditions
- Characterization of radiation fields diffused by phantoms
- Support activities to research lines of the Polytechnic Department of Energy
There is also the possibility of carrying out finalized research on a contract with third parties.
Calibration requests and timing
For the instrument calibration request, please download the following form (only in Italian):
The application forms can be sent to the University Quality Service (SQuA), by e-mail
- Email: taratura@polimi.it
- Tel: +39 02 2399 9253
An economic offer will follow the request. Once accepted, an appointment is agreed upon for the shipment of the instrumentation.
The certificate is issued within 20 days. working, upon payment of the invoice.
Information and contacts
For information about our activities, please contact our reference person:
Marco Caresana
Email: marco.caresana@polimi.it
Tel: +39 02 2399 6336
